Do This 1 Trick Immediately After Using A Sieve To Prevent Stuck-On Food

Ah, sieves ― they’d be such a handy tool if they weren’t nigh-on impossible to clean.

As someone who tends to be much kinder to “current me” than I am for “future me,” – I still end up using mine about once a day.

It’s perfect for draining pasta (except for the washing). It’s a great way to ensure no lemon seeds end up in the juice (except for the washing). It’s useful for sifting flour, too, except… well, you get the message.

So you can only imagine how relieved I was to find that taking one simple step immediately after using the tool can prevent an awful lot of stuck-on food.

Which is?

Food magazine Bon Appétit wrote that whacking the utensil against your sink as soon after using it as possible is really, really helpful.

“As soon as you finish using your sieve, bang it against the sink,” they shared.

“This helps dislodge some of those smaller pieces that haven’t had time to mush up and settle in.”

They add that you should also soak your sieve in very hot, soapy water for 15 minutes “right away.”

A dash of distilled white vinegar added to the mix can make cleaning it even more effective, the publication says.

However, for both methods, speed is key.

Is that the only hack?

Far from it. In a Reddit thread about the cooking conundrum, site users were full of recommendations.

“I turn it upside down in the sink, and use the sprayer to blast the back side. This usually cleans it pretty well,” one Redditor wrote.

Many advised against letting your sieve rest after use, even for a minute ― more people than I’d expected knew about the “banging it against the sink” trick too (am I the only one this is news to?).

Yet another person suggested using a toothbrush if the debris gets really dire (Bon Appétit reccomends this too).

With all the resentment I’ve built up to that accursed mesh, hitting it against the sink should be easy…

Share Button

The 1 Thing That Will Make Your Bathroom More Dementia-Friendly

According to the NHS, research shows there are more than 944,000 people in the UK who have dementia, and this is only increasing as people are lving longer.

The NHS also state that in the early stages of dementia, sufferers may be able to live at home, continuing to enjoy doing the things they have always done and having an active social life.

However, there are steps you or a carer can take at home to make the condition easier to manage and offset the more difficult days of dementia.

Now, Dementia UK have shared tips for making bathrooms more dementia-friendly

On their TikTok channel, a specialist dementia nursing charity have shared their tips for making bathrooms more dementia-friendly, and they’re really simple.

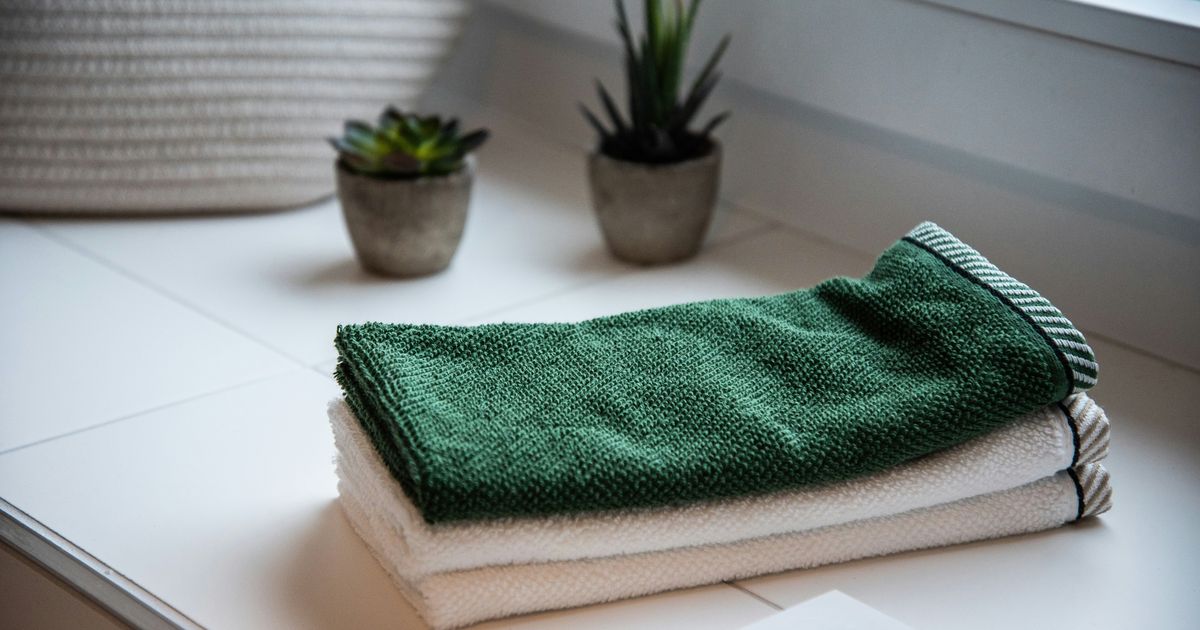
Most notably, the charity recommend using brightly-coloured towels which, as well as just making your bathroom a little more colourful, will stand out more on the towel rail and make spotting them easier.

Additionally, the experts recommend that if you have a fabric bathmat, this should be rolled up when not in use to prevent trips and falls.

While this is probably just good practice in general, NHS Inform urge that dementia sufferers are at a higher risk, saying: “There are different personal risk factors that cause people to fall, however, people with dementia are at greater risk because they: are more likely to experience problems with mobility, balance and muscle weakness.”

Dementia UK offer more tips for making bathrooms accessible

On their website, Dementia UK recommend the following steps for making bathrooms a safer place for dementia sufferers:

  • Stick a written sign or a picture of a toilet to the door to help the person identify the bathroom
  • Leave the bathroom light on at night to help the person find their way
  • Fit a toilet lid and seat in a different colour from the toilet itself to make it more visible
  • Use a free-standing toilet roll holder. These are easier to see than wall-mounted holders, and putting it right next to the toilet means the person does not have to stretch and potentially lose their balance – but if the person is prone to falls, be aware that they may be a trip hazard
  • Install rails or handles at useful points such as in the bath/shower and next to the toilet
  • Provide a bath or shower seat if the person has mobility or balance problems
  • Use flood and scald prevention plugs in the basin and bath
Share Button

Having WiFi Troubles? This Common Household Appliance May Be To Blame

According to Forbes, around a quarter of us work from home regulalrlyh and for that, we need consistently good WiFi speeds and reliable internet for our work, meetings, and availability on Slack.

However, it isn’t always that simple. In fact, I’d argue that if you haven’t found yourself aimlessly arguing with your router at least once, you haven’t hit the final boss of working from home.

That being said, before you call your provider to complain, Trevor Cooke, the privacy expert at Earthweb, has outlined four things that may be holding your WiFi back.

The surprising things that could be slowing your WiFi down

Microwaves

I know! I know!!!

Cooke said: “Microwave ovens operate on the same 2.4 GHz frequency as many WiFi networks. When in use, they can cause significant interference, leading to slower speeds or temporary disconnections.”

Cooke recommends that the router is placed away from the kitchen and any microwaves. He also advised that if your router supports it, the 5 GHz band is less prone to microwave interference.

Bluetooth devices

Cooke said that Bluetooth devices, such as wireless headphones, speakers, and keyboards, also use the 2.4 GHz frequency, potentially causing WiFi signal disruption.

To address this, limit the use of Bluetooth devices near your router or switch to the 5 GHz band for your WiFi network if possible.

Thick walls

Unfortunately, the structure of your home can significantly impact WiFi performance.

Cooke said: “Thick walls, especially those made of concrete or brick, can obstruct and weaken WiFi signals. ”

He recommends using WiFi extenders or mesh networkers to boost the signal in homes with thick walls.

Electronic devices

Other electronic devices, such as baby monitors, can interfere with WiFi signals by creating radio frequency interference.

Investing in newer electronic devices designed to minimise interference with WiFi signals can help to improve your connection.

Who knew?!

Share Button

UK Gardeners Warned About This Watering Mistake Which Could Ruin Plants

If you’re a keen gardener, you may be looking forward to the coming months as you fill your garden with plants, flowers, and even vegetables – but did you know that you may have actually been watering your plants wrong?

Yep, it turns out that there is a right way to water plants and it definitely isn’t just pouring water from a watering can over them the way that some of us are used to doing.

So, what is the right way to water plants?

According to the Royal Horticultural Society (RHS), there is an art to watering plants, especially if you hope to avoid wasting water and give your plants the best possible chance at flourishing.

According to the RHS, the best time to water is in the mornings as this is when the sun rises and plants will start to use water. They added: “The foliage and soil surface is also likely to stay drier for longer than evening watering, discouraging slugs, snails and mildew diseases.”

Each individual plant has its own watering schedule so it is worth researching the plants growing in your garden to figure out a schedule for keeping them hydrated and thriving.

When you are watering plants, especially if you’re using a watering can, it’s essential to water them at the roots. This is because wet or humid foliage encourages fungal problems and evaporation from surfaces.

The RHS added: “Watering more thoroughly, but less frequently helps get the water down to the deeper root tips.

“It is better to water the garden before drought really sets in, to keep the soil moisture levels even and avoid the soil being continuously dry.”

However, the society warned that soil doesn’t have to be really wet all the time because plants need air as well as water to grow.

What is the best water to use on outdoor plants?

According to the RHS, rainwater is actually best as it’s freely available if you are able to store it. Additionally, tap water requires treatment and often contains more minerals than many plants need.

Who knew?!

Share Button

3 Simple Steps To Save A Waterlogged Lawn, According To An Expert

Ah, soggy ol’ Britain. An island where your outfit on any given day should account for all possible weathers because truly, who knows what the day holds? This is especially true during spring when we don’t seem to have any consistency for three solid months.

Following a few weeks of hopeful sunshine, a lot of the country now has, predictably, downpour. Which is set to last for at least the rest of the week with flood warnings even being issued for parts of England, according to the Met Office. Yay.

Another issue that comes with this weather is that our gardens can get flooded (also known as waterlogged), which is dreadful news for those of us that were excited to finally get back into gardening after a long winter.

However, there are some things we can do to help our lawns recover.

How to fix a waterlogged lawn

Rhiannon Moore, a garden expert at Toolstation, shared her tips for tackling a flooded garden:

Remove any built-up debris

Moore advises that once the water has receded, you should immediately remove any leftover debris such as sticks and leaves to clear the surface of the lawn. She added that you shouldn’t use a metal rake for this as it’ll damage the already weakened soil surface.

Aerate the soil

Using a garden fork or aeration tool, spike holes into the soil surface that are no more than six inches deep.

Fertilise the soil

Using a feed that’s rich in phosphorus, fertilise your lawn. This will help to promote root growth as well as replace the lost nutrients in the soil.

Moore added: “It’s also important to remember not to mow a lawn after a period of extensive rain and make sure to avoid watering until the ground has dried out.”

Early signs of waterlogging

If you’re not familiar with waterlogging or are new to the world of gardening, you may not be aware of the signs of a flooded lawn. Moore shared the most important signs to look for:

  • Bare patches – As the grassroots start to die, it will result in bare patches of lawn. These first strike in the worst affected area

  • Moss patches – Whilst a small amount of moss is beneficial to a lawn, large amounts of it can cause the grass to die as the moss steals the ground nutrients

  • Excess weeds – Rogue weeds are a common sight in lawns however, they can quickly take over a weakened lawn and starve the remaining grass of nutrients

Long-lasting solutions for a waterlogged lawn

  • Level out the ground – If the flooding is only happening in isolated areas, you can add some topsoil and new turf to level out the uneven lawn

  • Add garden walkways – Each time you walk over your lawn, you compact it beneath your feet. Adding a simple paved garden walkway will help to protect your lawn from damage

  • Consider a French Drain – If flooding is a regular issue, you may want to consider installing a French drain. This is a gravel-filled ditch with a perforated underground pipe to drain away the water. It’s best to check with your local planning authority before starting any digging

Let’s hope for sunnier days soon!

Share Button

How To Keep Rats Out Of The Garden Without Killing Them This Spring

No offence to the little critters but for many gardeners, rats are really quite unwelcome visitors. Setting up little homes beneath decking, in sheds, greenhouses or even compost heaps means that they infiltrate the nooks and crannies of our gardens.

As they’re nocturnal, and quite skittish anyway, you’re unlikely to see a rat in the garden but signs such as rat tunnels, runs, droppings and even teeth marks can sprinkle throughout your treasured green space, letting you know that rats are living there.

The problem is, for many outdoorsy folk, killing them or poisoning them isn’t an option. I mean, of course. They’re just existing. But then, how do you get rid of them without harming them?

Thankfully, the experts at Gardeners’ World have some ideas to keep the rats at bay.

How to get rid of rats in my garden humanely

Instead of opting for rat traps, put the bird feeders away

If you have bird feeders hanging for local birds, you may be inadvertently attracting rats. This is because bird food being as small and light as it is, often falls to the ground and this attracts rats. For a while, stop filling bird feeders and if you have chickens, secure the run to deter rats.

One of the best rat repellents is simply… keeping your garden tidy

Messy gardens filled with clutter and overgrown areas are more likely to appeal to rats because of how much cover they provide. Give your garden a good tidy, especially near fences, and keep it today to deter rats.

Protect your compost heap and keep it moist

Avoid adding food scraps to your compost heap for a while and, if you can, keep it moist by including lots of greenery and mud. Gardeners’ World added: “Fixing chicken wire around the base of the bin can also help, as it prevents rats from being able to dig beneath the bin to climb inside.”

Block access to sheds and greenhouses

Rats can make their way into many small cracks, so make sure that your buildings are secured and block any gaps.

Move things around the garden to put them off coming back

Rats hate change and specifically change to their own territory. Move furniture, potted plants and anything else around your garden to encourage rats to find somewhere else to call home.

Finally, if you have any water sources such as a dripping tap that can be shut off, turn them off for a short while if you’ve exhausted all other options.

Share Button

I Can’t Un-Read Mary Berry’s Tomato-Less Tomato Soup Recipe From The 70s, So I’m Sharing It

Now, I am a Mary Berry STAN. I love her. I love her recipes, I love seeing her on TV and I stopped watching Bake Off when she left because, truly, what’s the point?

That being said, my vintage Mary Berry cookbook from the 70s is not always… perfect, shall we say.

Take, for example, the tomato soup that I found in there today. It’s a ‘summer’ tomato soup which means it’s eaten cold and not cooked but also… there are… no actual tomatoes that need to be chopped for this recipe?

I swear, I had to keep re-reading because I thought I’d missed a step but apparently I didn’t and neither did Mary herself because this is still an entire soup.

I can only put it down to the 70s being a little weird.

Mary Berry’s Tomato-Less Tomato Soup Recipe

So. If you’re feeling like a yoghurty gazpacho is on your bucket list, you may want to try this vintage recipe. It’s not for me personally but as Mary says in the recipe itself, “it’s very much a sophisticated taste” and what can I say? I’m an uncultured buffoon.

So, for this alternative tomato soup recipe, you’ll need:

  • 500ml of natural yoghurt
  • 500ml of tomato juice
  • The juice and grated rind of a lemon
  • 1/2 cucumber, cut into 5cm cubes
  • Salt
  • Ground black pepper
  • Worcester sauce
  • Cucumber slices for garnish

… Told you! No tomatoes! Juice tomato juice!

Then you simply:

  • Whisk together yoghurt and tomato juice
  • Stir in lemon juice, grated lemon rind and cucumber
  • Season well and add Worcester sauce
  • Serve chilled and garnished with thin slices of cucumber

This comes from a vintage cookbook of Mary’s from 1975: Beating The Cost Of Cooking and while I likely wouldn’t choose this meal, I’ll cherish this throwback cookbook forever.

Share Button

This Kitchen Cupboard Essential Is About To Make Shovelling Snow So Much Easier

You don’t need to open an app or switch on your TV to know that it’s, to use a technical term, bloody freezing right now.

And it’s probably not escaped your attention that the ice and frost that can build up on your car, roads, and gardens can sometimes be seriously disruptive.

In fact, sporting events have already been cancelled under the current snowy conditions ― drivers have been warned of roads becoming ’ice rinks.’

So, shovelling snow might become a part of your morning routine over the next couple of days. But it turns out that there’s a simple, cheap trick to keep your shovel blade smooth ― simply spray some cooking oil onto the base.

Why?

In short, it’s a simple case of lubrication.

Oil freezes at a much lower temperature than water, so it won’t seize up in cold weather ― unlike water-based alternatives.

So, using cooking spray, vegetable oil, or wax on your spade before you start shovelling snow can help it to slide through the snow and ice faster than it would otherwise, without running the risk of getting stuck.

“If the snow begins to stick to the shovel, it is time to reapply the spray or oil. It is best to apply it before every use,” AccuWeather adds.

Any other tips?

Yes! Wearing thick socks over your shows can provide extra grip, meaning you’re less likely to slip and slide on ice and snow.

And while we’re speaking about footwear, stuffing your shoes with newspaper after heavy snow exposure can help them to dry out faster and maintain their shape.

We’ve written before about how rubbing a cut potato over your windshield the night freezing temps take hold can lead to condensation-free glass in the morning (yes, really).

Most of all though, stay as warm and as safe as possible during the cold blast (ah, UK weather…).

Share Button

UK Gardeners Urged To Dig Hole Under Fence For 1 Reason

Can we call it “winter” now? I mean, I know it’s just turned November ― but the sun’s down before 5pm, my extra-thick coat has come out of its vacuum-packed home, and my garden’s autumn bounty has officially faded away.

We’re not the only species to feel the shift, either. Birds, bats, hedgehogs, and bees are starting to struggle in the less-plentiful season ― but it turns out that digging a teeny-tiny hole in your garden could help.

“Combined, our gardens provide a space for wildlife larger than all our National Nature Reserves, so by gardening in a wildlife-friendly way, we can help our spiky companions move around safely and find a home,” The National Wildlife Trusts shared.

But unless the critters have a way into your garden, all of that land is practically useless to animals.

Why does digging a hole help?

“Hedgehogs must feed intensively and be in great condition before hibernating if they are to have enough reserves to last the winter,” Wild About Gardens says.

In fact, the average hedgehog roams 2km a night. To get into prime resting state, they need access to food ― and somewhere to hibernate in the first place.

We’ve written before about how helpful it can be to pile your dead leaves into a leaf bay or heap rather than removing them entirely (this helps to provide insects and shelter for hedgehogs and other beasts).

We’ve also shared how meat-based cat and dog foods can nourish hedgehogs when left out in your garden ― but without a hedgehog hole to access these, your efforts might be futile.

How can I create a hedgehog highway?

Cutting a small hole in your fence panel with a coping saw, and digging under your pence, removing bricks from walls all work, the RSPCA says. “Hedgehogs can travel through gaps as small as 13x13cm, so these gaps don’t need to be large,” they add.

Of course, you’ll want to get your neighbour’s permission before creating the hole ― especially if you want to create a multi-garden hedgehog highway all down your street with the help of your neighbours.

“Keep an eye out for neighbours doing work on their gardens, or using fencing contractors ― this is the perfect opportunity to get a hedgehog hole put in,” The Wildlife Trust suggests.

The Wildlife Trust’s Hedgehog Street programme encourages people to link their gardens to create a hazard-free, insect-rich pathway. You can go to their go to the national network at Hedgehog Street to record your own hedgehog hole.

Right, I’m off to dig a hole…

Share Button

To Pre-Rinse Or Not To Pre-Rinse? The Age-Old Dishwasher Argument Has Finally Been Settled

I don’t know about your household, but mine faces the same debate on repeat: should you rinse your dishes before putting them in the dishwasher, or not?

I’d always thought both sides made a valid point ― until I heard from Ian Palmer-Smith, appliance expert at Domestic & General, about the topic.

“One of the biggest dishwasher myths is that you need to rinse items before loading them,” he shared via email.

Here’s his reasons against pre-rinsing, as well as some other dishwasher tips from the pros.

Why shouldn’t you rinse your dishes before placing them in the dishwasher?

Palmer-Smith says that, in short, the practice is just a bit useless: “Pre-rinsing plates is a bit like hand washing your car before taking it to the car wash.”

Then, there’s the added boiler costs of using extra hot water (which, though likely not a huge percentage of your bill, are best avoided if not needed).

“In reality, [rinsing before dishwasher use] uses extra unnecessary hot water and typically won’t improve the results. Modern dishwashers use high temperatures designed to break down stubborn stains with little trouble,” he says.

Of course, that’s not to say you should just lob a loaded plate into your appliance, he adds. Scraping is the way forward, Palmer-Smith says, as too much gunk can clog your machine.

He concedes, however: “If you have a pan with some burnt-on food residue it can be a good idea to give it a soak beforehand.”

Still, it’s bad news for the rinsing regiment.

Dishwashers are more energy-efficient than you might think

In case you think I’m escaping the Dish Debate scot-free, you’re wrong; I’m usually a proponent of hand washing, because I always thought dishwashers used way too much energy.

But according to Palmer-Smith, I’m in the wrong.

“Even without pre-rinsing, dishwashers generally use less hot water than hand washing,” he says (that is, of course, if you have a dishwasher already).

“On average, a dishwasher uses water four times more efficiently than washing by hand so if you are running a load when the appliance is full, this can actually ease your energy bills more than most think,” the appliance pro adds ― and it turns out that science agrees.

Well, that’s a load of stress (literally) off my hands…

Share Button