I Tried Mary Berry’s Secret To The Best Spaghetti Bolognese, And I’m Never Going Back

I try a lot of celebrity chef recipes for my job (hard-hitting journalism, you know?).

And while I love Nigella Lawson’s iconic lasagne of love, swear by Hugh Fearnley-Whittingstall’s brown butter brownies, and have even allowed Gordon Ramsay’s tips to alter my treasured rocky road recipe, my heart still lies with Mary Berry.

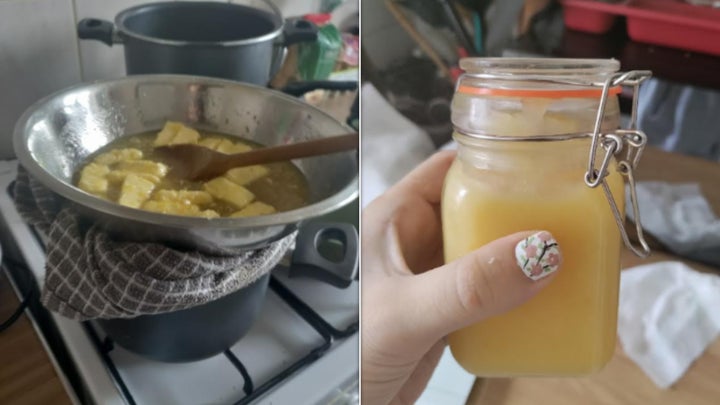
Her Thai-inspired tomato soup was an instant hit in my home. I tried making her 15-minute lemon curd last weekend too ― it was so good, I skipped making the rest of the pie I’d planned and made six jars instead.

So, who else would I turn to for my next spag bol? Though the dish is described as “controversial” on the BBC’s site for its, er, un-Italian star ingredient, hey ― in Mary we trust.

The chef adds cream to her bolognese

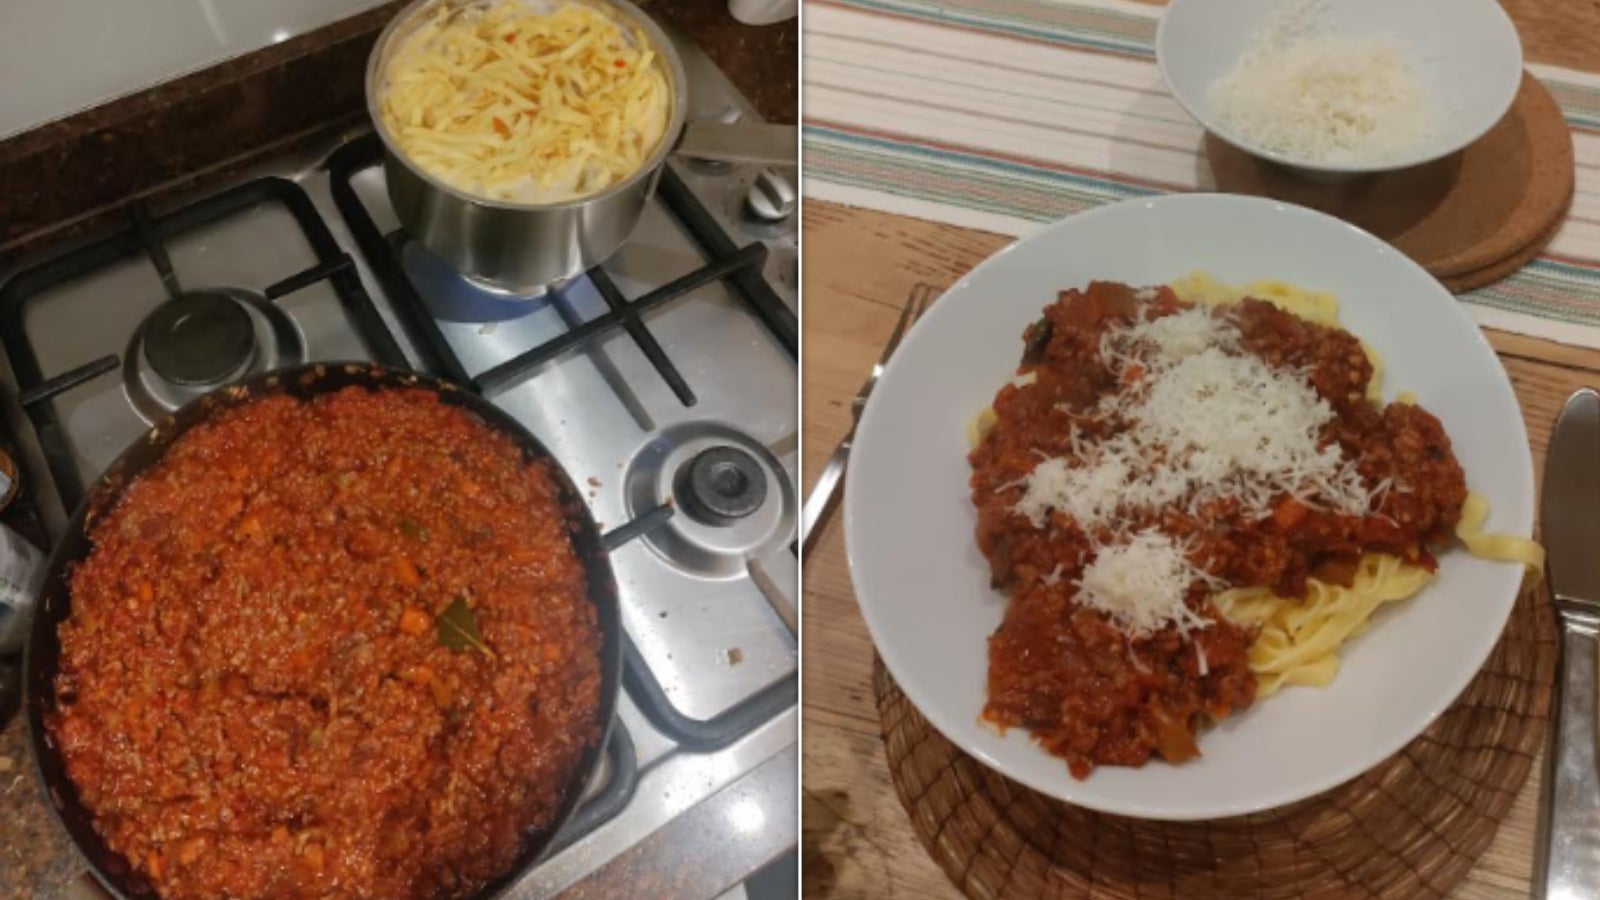
The start of Mary’s bolognese is pretty simple. She finely chops onions, celery, and carrot, and fries them over a medium-high heat until soft.

I took Nigella’s lasagne advice here; it’s just faster to whizz them up in a blender rather than chopping them to tiny, even bits.

Once those have softened, she chucks in pork and beef mince (I’ll be honest; I only had beef, and it was fine) and garlic, cooking them until the mince is browned and its liquid has evaporated.

Mary adds tomato purée to the mix and follows it up with passata, chopped tomatoes, stock, wine, and thyme.

If you take nothing else from her advice, I’d recommend the half-passata, half-chopped tomato mix for almost all tomato-based dishes now I’ve tried it. Tinned tommies can be too watery, while the paste can be too thick – this is perfect.

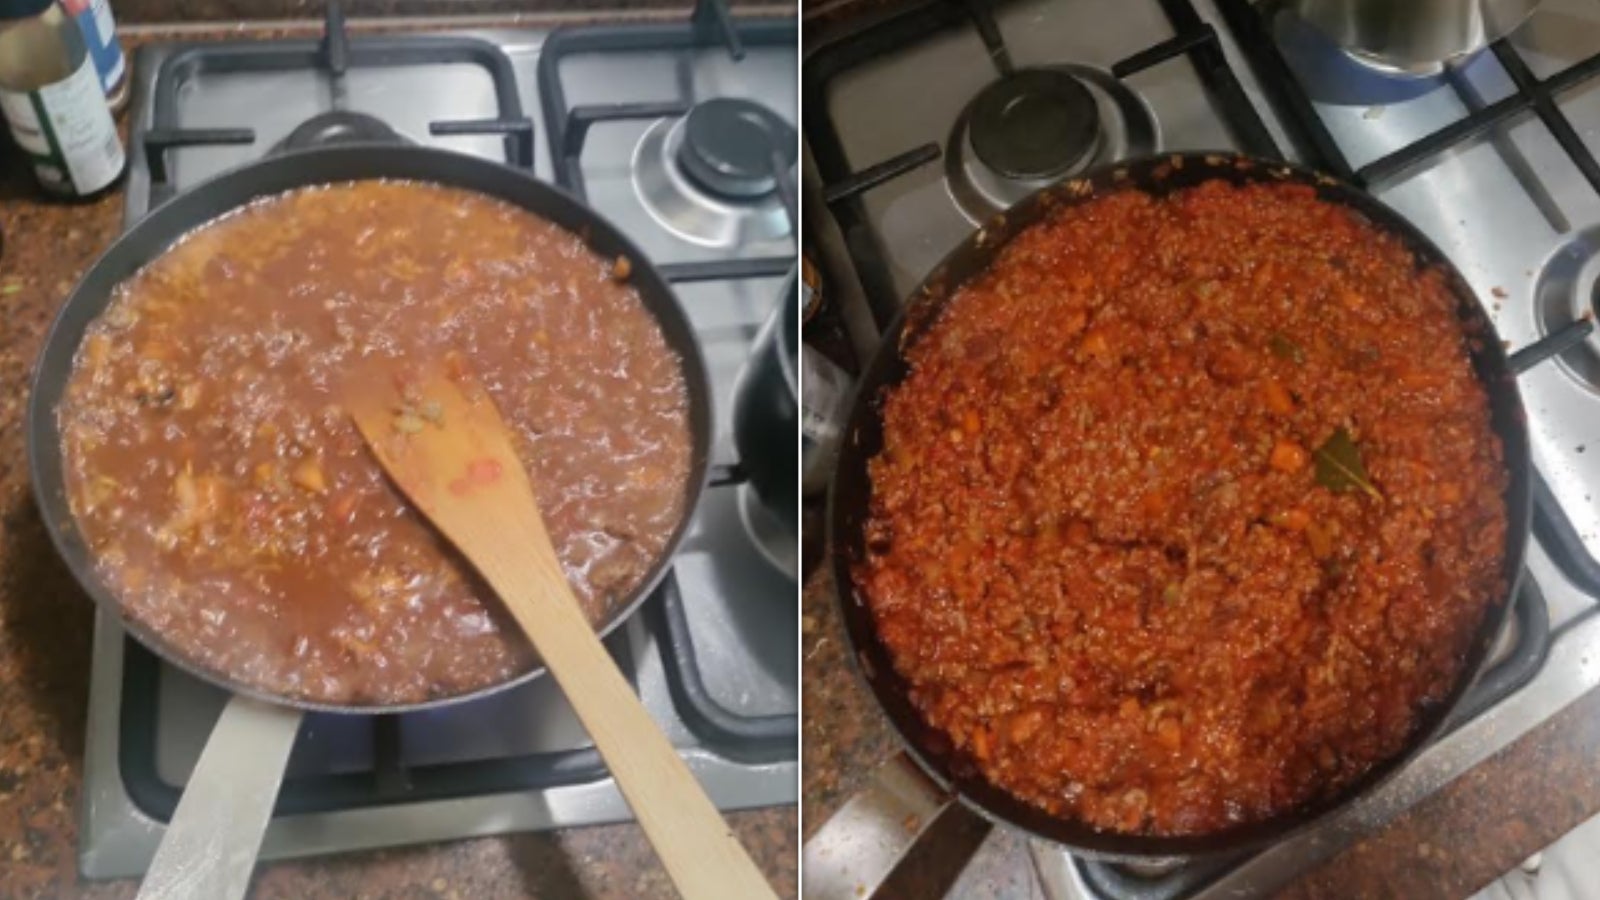
After seasoning it, you bake the bolognese for an hour. I placed tinfoil over my frying pan and whacked it in the oven, though I’m sure a proper Dutch oven is a better option.

Then, you stir in some cream (the controversial ingredient), put the bolognese back in for an hour, and serve it with whatever pasta you like.

Bolognese before baking (left) and after (right).

Amy Glover / HuffPost UK

Bolognese before baking (left) and after (right).

So… what’s the verdict?

I regret to inform you it’s delicious. I don’t know whether it’s the cream or the extended stay in the oven that did it, but this was the deepest, richest, most satisfying bolognese I’ve tried.

It kind of makes sense ― Nigella adds milk to her lasagne’s ragu for a subtly creamy finish, so this is sort of the same idea (only more decadent).

The two-hour bake time is annoying, but it didn’t require much actual active cooking. I work from home, so made the sauce on my lunch break and cooked it in the oven while I was working. As Mary points out, the sauce “can be made up to a day ahead and reheated.”

I ate mine with Parmesan, linguini, and a huge smile on my face ― OK, her star ingredient is “controversial”, but there’s no denying the results are delicious.

Share Button

I Tried Mary Berry’s 15-Minute Lemon Curd Recipe, And I’ve Made 6 Jars Since

Ex-Great British Bake-Off host Mary Berry doesn’t just do sweet treats ― we love her sausage casserole and “Mexican lasagne” recipes for our midweek meals.

With that said, there’s a reason one of her (many) cookbooks is called The Baking Bible. When I want to make dessert, I turn to the Cordon Bleu-trained chef first.

This weekend, I craved a lemon meringue pie. So, I thought I’d give her pared-down recipe a go (I’d tried more complex recipes recently, like a pomegranate curd, and had been left with a runny disaster).

People, the pie never got made. The curd was so good, I simply slathered it on slices of bread and ate spoonfuls from the jar ― I re-made double the recipe again to stay in stock for the rest of the month.

How does Mary Berry make her lemon curd?

Her instructions are simple: whisk one egg per whole lemon zest and juice to 75g caster sugar and 56g butter together. Twice this calculation makes roughly a jar.

Then, keep whisking the lot over a gentle heat for seven to 10 minutes. Mary warns: “Do not allow the mixture to boil or it may split.”

For that reason, I made my first batch in a heatproof bowl over a saucepan of boiling water (like the one you’d use for melting chocolate).

I recommend this if, like me, you’re using thin, cheap saucepans; if you have a heavy-bottomed saucepan and really good temperature control on your hob, though, a saucepan should be fine.

Once the mixture has thickened enough to coat the back of a wooden spoon, you’re ready to spoon the curd into a sterilised jar ― it should thicken in a couple of hours, and the curd will last for a month or so in the fridge.

I loved that Mary uses the full zest and curd of all lemons. It makes a brilliantly tangy curd, and also means your kitchen smells amazing for hours.

I also think it made the curd less creamy, which I personally prefer.

Lemon curd cooking on left: jarred on the right

Amy Glover / HuffPost UK

Lemon curd cooking on left: jarred on the right

Any other tips?

Yes! Mary’s advice for sterilising the jars accidentally ensures they’re capable of taking in the hot curd without breaking or cracking, too.

“To sterilise jars, wash the jars in very hot, soapy water or put through the hot cycle of a dishwasher,” she writes.

Then, “place the jars onto a baking tray and slide into an oven preheated to 160C/325F/Gas 3 for 10–15 minutes”.

I spooned my curd into the jars while they were still warm(ish) from the oven. That way, you run far less risk of a shattering disaster.

Share Button

Mary Berry’s No-Bake Banoffee Pie Recipe Is So Simple That I’ll Never Make It Another Way

Sometimes, you get hit with a very specific craving. For a while there, I had a hankering for sour cream and chive pretzels. No idea why — it’s not like they’re something that I have often.

Now, though, now I am craving the delectable, moreish joys of a banoffee pie. Sweet, soft, and with a lovely silky finish to it… I actually can’t think of anything I want more in this moment.

Thankfully, I don’t need to wait too long to tuck into this coveted dessert as the cake queen herself Mary Berry has a banoffee pie recipe that is so simple that it doesn’t even require baking.

Marry Berry’s banoffee pie recipe

As featured on her BBC One series Classic Mary Berry, this recipe requires:

  • around 10 digestive biscuits
  • butter
  • muscovado sugar
  • condensed milk
  • vanilla extract
  • double cream
  • bananas
  • dark chocolate or cocoa powder

Additionally, she advises, if you’d like to make a salted caramel version, you only need a teaspoon of sea salt. Yum.

The base can be made up to a day in advance and to make it, Mary advises doing the following: “Crush the biscuits to fine crumbs and melt the butter over a low heat.

“Pour both into a bowl and mix to combine. Spoon into the base of the tin and press down with the back of a spoon until level. Place in the fridge for 15 minutes

The banana and cream should be made on the day and left for around an hour to set in the fridge.

The toffee is the only really tricky part of the recipe, requiring precision and focus. For that, you heat butter and sugar together and stir over a low heat until combined. Then you add the condensed milk and bring to the boil, stirring for a few minutes.

However, if you over-boil it, it will become grainy and more like fudge, which is not the vibe.

If you’re also ready to treat yourself to this delicious pie, you can view the full recipe here.

Share Button

Mary Berry’s Unusual Secret To The Most Luxurious Fish Pie

Mary Berry isn’t afraid to switch up a classic recipe.

She uses tortillas in place of pasta sheets in her speedy “Mexican lasagne” recipe, for instance ― wraps form the base of her no-fuss midweek quiche too.

And her posh version of cottage pie is topped not with mash, but with creamy, cheesy dauphinoise.

So perhaps I shouldn’t be surprised to learn that the former Great British Bake-Off host’s fish pie recipe has a similarly decadent topping.

In her elevated version of the dish, Mary’s “fish pie with a twist” boasts a topping most chefs would be proud to present.

What’s her topping?

Mary adds a “fancy soufflé style topping” to the usually humble meal.

After cooking off her leeks and forming a roux, she seasons the sauce and adds fish to it.

Then, she spoons the pie base into a casserole dish with some hard-boiled eggs and places it on the counter ’til cold, then in the fridge until hardened.

Once it’s chilled, the Cordon Bleu-trained chef starts on her soufflé, copping some crustless white bread into chunks.

She puts cream cheese, butter and cheese in a pan until melted, setting it aside to cool when she starts whisking egg whites in a separate, “spotlessly clean” bowl.

After the egg whites have reached stiff peaks, Mary adds salt and pepper to them before gently folding the mixture into the cheese and butter along with the bread chunks.

That goes on top of the chilled fish pie mix before hitting the oven for 20-25 minutes, or “until golden-brown and bubbling.”

Mary’s not the only chef to combine the two

Delia Smith has a similar recipe, sharing that most cuts of white fish “instantly become more special when made into a fluffy soufflé.”

Her recipe incorporates the fish into the batter, rather than sitting underneath it, though.

Chef Marcello Tully does separate his fish-infused soufflé from its spinach base and creamy sauce, but doesn’t keep the haddock away from the topping.

You can’t say Mary isn’t original…

Share Button

Mary Berry’s Unexpected Secret Ingredient For Delicious Turkey Skin

With Christmas day being only days away, it’s almost time to start prepping the turkey. It’s not often the most pleasant of activities, what with the uh, giblets removal and all but with the right preparation comes the most succulent of Christmas meats.

This year, we’re looking to none other than the queen of the kitchen herself, Mary Berry, for our turkey recipe. After all, who better to help us cook up a storm and impress our family with our kitchen tricks?

Of course, by this point we all have our own traditions for cooking the Christmas turkey but this year, we’ll be adding a little of Mary Berry’s finishing touches to the skin with orange slices.

The perfect finishing touch to roast turkey

So, in Mary Berry’s turkey crown recipe as featured on Mary Berry’s Absolute Christmas Favourites, she has two oranges ― one cut into slices and one cut in half and these add finishing touches to the cooking of the turkey.

So, once you’ve done your own preparations, loosen the skin on the turkey using your fingers or a spatula, gently so as not to tear anything. Then, mix two teaspoons of thyme leaves with 50g of softened butter and smear the mixture underneath the skin of the bird.

Then, arrange orange slices in two neat rows, under the skin and on top of the herb butter.

As for those orange halves? Place one under the skin at the neck end of the bird and any orange trimmings in the cavity.

This mix of citrus and herbs gives a perfectly Christmas flavour to the tastebuds and with not-too-much effort.

Plus, if you have any leftovers, these can be frozen for up to a month. Just make sure you wrap them up well!

Share Button

Mary Berry’s 15-Minute Secret To The Juiciest, Crispiest Turkey

It’s not just down to your cooking skills; turkey really is a naturally drier bird as its both large and relatively lean, which makes even cooking difficult.

The usual solutions to this problem ― spatchcocking the bird or cooking only its fattier parts, like legs ― are sensible, but feel patently un-festive.

After all, what’s more Christmassy than lifting a plump golden turkey crown from the oven, stuffed with citrus and slathered in butter?

So it’s a good thing former Great British Bake-Off judge Mary Berry has a 15-minute trick that allows you to keep your turkey crown intact while adding some much-needed moisture and flavour.

What’s the trick?

Mary Berry uses a multi-pronged approach; not only does she stick to a crown rather than a whole bird so it cooks more evenly, but she also stuffs the bird with citrus fruits, places butter under the skin, and bastes the meat every so often.

She recommends placing tinfoil on the top of the crown if you notice it browning too quickly, too. This traps the moisture in and prevents a dry top layer.

But the real secret to tasty, juicy, perfectly crisp success happens 15 minutes before she removes the poultry from the oven.

She suggests we “squeeze the juice from the remaining half-orange over the turkey” a quarter of an hour before its cook time ends.

Then we should “Return the turkey to the oven, uncovered, to allow the skin to crisp up.”

That’ll provide an extra last-minute boost of flavourful moisture, and the sugar in orange juice will caramelise into a thin, crisp layer that adds an extra crunch to the bird’s delicate skin.

Any other tips?

Yes ― you absolutely have to rest your turkey, even if it’s just a crown or legs, for a minimum of 30 minutes.

Mary Berry covers her turkey crown in tinfoil while it rests, trapping even more steam and moisture.

That helps the turkey to re-absorb its juices, ensuring it’s mouthwateringly juicy.

Gordon Ramsay also adds butter on top of his turkey breast before drizzling it with olive oil ― the more fat, the juicier the bird will be.

And for what it’s worth, I’m with Nigella Lawson on the meat’s prep ― “For me the only turkey is a brined one,” she shared on her site.

“Not only does it tenderize and add subtle spiciness, but it makes carving the turkey incredibly much easier.

Share Button

Mary Berry’s Failsafe Recipe For The Best Paris-Brest

You may have seen bakers struggle to make the dreamy Paris-Brest dessert featured on this Tuesday’s Great British Bake-Off.

But if you’re anything like me, a delusional part of your brain probably also went: “That looks nice, I could do that.”

Well, if you want to attempt the precarious pastry, it turns out that none other than GBBO’s former judge Mary Berry has a timeless recipe.

Sharing her know-how on BBC’s site, the Cordon Bleu-trained chef said: “These decadent pastries filled with praline and cream are like giant profiteroles, perfect for sharing.”

How does Mary make ’em?

She says you’ll need”a food processor, a piping bag, a star nozzle and a silicone mat” to perfect her recipe, which offers two Paris-Brests (a pair if you will).

She preheats her oven to 220C/200C, lines a baking sheet with baking paper, and draws four 10cm-ish circles on it before flouring the parchment.

Then, she makes choux pastry by putting milk, salt, sugar, butter, and water into a pan, removing from the heat once it starts bubbling, and ― frankly ― beating the bejesus out of it “until it forms a dough that leaves the side of the pan clean.”

Then she places the mix back into the pan and heats it for five minutes or so.

Once cooled slightly, she beats eggs into the dough “until the dough is smooth and glossy,” and then place it in a piping bag.

She pipes four thick rings into the circles she drew earlier, then tops them with egg wash and almonds.

These should be baked for 10-15 minutes at full temp, and then a further 10 minutes at 180C/160C Fan/Gas 4; dry them out in an opened oven for three minutes afterwards.

Then, Mary makes a praline by spreading hazelnut-filled caramel onto a silicone mat, leaving it to cool, and whizzing it in a blender.

She also makes vanilla whipped cream for the filling.

“Sprinkle half the praline onto the bottom halves of the choux rings, then pipe a generous amount of cream over the praline. Sprinkle the remaining praline over the cream and place the pastry lids on top. Dust with icing sugar and serve,” Mary says.

Why is it called a Paris-Brest to begin with?

Per The New York Times, it was created by pastry chef Louis Durand.

It was named after a bike race that runs between Paris and Brest, a port city; it was even designed to look like a bike.

The New York Times advises making your praline first, in direct contradiction with Mary Berry’s advice (should we make them cycle a race to determine the winner?).

Share Button

Mary Berry’s Unexpected Secret To The Best Marmalade Cake

I don’t know about you, but the upcoming release of a new Paddington movie (Paddington In Peru, out November 8) has gotten marmalade on my mind.

So who else to turn to for a perfect marmalade cake recipe than Mary Berry, who’s penned the perfect orange jam-based traybake recipe?

The former Great British Bake-Off judge shared the cake in her book Mary’s Baking Bible, which home bakers like Mel and Alex of Tale of 2 Kitchens tried and loved.

Surprisingly, though, she has some counterintuitive advice to prevent the cake from “buckling,” or sinking in the middle.

Which is?

You shouldn’t put too much marmalade in your marmalade cake, the Cordon Bleu-trained chef revealed.

Baking site Cakes By MK explains that “When it comes to baking, balancing your ingredients is key.

“If you have too much liquid or too much fat in your cake batter, this can result in a cake with a weak structure which can cause it to sink in the middle.”

The starches and binders in the cake can’t do their strengthening job if their path is interrupted by too much liquid.

This, along with a too-small cake tin, opening the oven door too soon, under- or over-mixing your cake batter, or having an oven that’s too cold can also contribute to the sinking, the baking pro adds.

How does Mary make her marmalade cake?

She begins by lining a baking tray with parchment and preheating her oven to 180°C.

Then she whisks all of the ingredients ― sugar, flour, marmalade, butter, sultanas, baking powder, cherries, eggs and milk ― into a bowl and chucks the lot in the oven for 40-45 minutes.

Pretty simple, right? And if the reviews are to be believed, it’s delicious too ― “A lovely, soft and fluffy traybake, this is more like a sponge cake in a tray than the usual slice,” A Tale Of 2 Kitchens writes.

Share Button

I Can’t Un-Read Mary Berry’s Tomato-Less Tomato Soup Recipe From The 70s, So I’m Sharing It

Now, I am a Mary Berry STAN. I love her. I love her recipes, I love seeing her on TV and I stopped watching Bake Off when she left because, truly, what’s the point?

That being said, my vintage Mary Berry cookbook from the 70s is not always… perfect, shall we say.

Take, for example, the tomato soup that I found in there today. It’s a ‘summer’ tomato soup which means it’s eaten cold and not cooked but also… there are… no actual tomatoes that need to be chopped for this recipe?

I swear, I had to keep re-reading because I thought I’d missed a step but apparently I didn’t and neither did Mary herself because this is still an entire soup.

I can only put it down to the 70s being a little weird.

Mary Berry’s Tomato-Less Tomato Soup Recipe

So. If you’re feeling like a yoghurty gazpacho is on your bucket list, you may want to try this vintage recipe. It’s not for me personally but as Mary says in the recipe itself, “it’s very much a sophisticated taste” and what can I say? I’m an uncultured buffoon.

So, for this alternative tomato soup recipe, you’ll need:

  • 500ml of natural yoghurt
  • 500ml of tomato juice
  • The juice and grated rind of a lemon
  • 1/2 cucumber, cut into 5cm cubes
  • Salt
  • Ground black pepper
  • Worcester sauce
  • Cucumber slices for garnish

… Told you! No tomatoes! Juice tomato juice!

Then you simply:

  • Whisk together yoghurt and tomato juice
  • Stir in lemon juice, grated lemon rind and cucumber
  • Season well and add Worcester sauce
  • Serve chilled and garnished with thin slices of cucumber

This comes from a vintage cookbook of Mary’s from 1975: Beating The Cost Of Cooking and while I likely wouldn’t choose this meal, I’ll cherish this throwback cookbook forever.

Share Button

This Is How Mary Berry Levelled Up Her Scrambled Eggs In The 70s

The words ‘national treasure’ are thrown around far too lightly for my liking but when it comes to Mary Berry, they absolutely apply. First appearing on our screens in the 70′s, Mary has been teaching the nation to cook and bake for longer than I’ve been alive.

My first real exposure to her was obviously Great British Bake Off where her cheeky little smiles were a perfect sidekick to co-host Paul Hollywood’s gentle snark. Racing over to my friend’s after work, we’d tuck into some pasta, share a bottle of wine and talk about whether it was too late for Mary to adopt us as her granddaughters.

With all of this fangirling in mind, it’s probably not a surprise to learn that I forked out for a vintage cookbook of Mary’s from 1975: “Beating The Cost Of Cooking”. It’s yellowed, bent a little in the middle and perfect.

Mary Berry’s vintage scrambled eggs recipe

I bought this book mostly to learn how much not only Mary’s cooking has changed over almost 50 years but how much food trends have changed in general. It’s a great read but there are some that I’m glad stayed right where they belong. In the 70s.

Take for example, the ‘sweet corn scramble’. I don’t know if it’s because I hate sweetcorn or because the illustration is… vile, but this one really got my stomach turning.

Anyway, if sweetcorn isn’t an issue for you, you can try this vintage scrambled eggs recipe from Mary herself.

You’ll need:

  • 6 eggs
  • 6 tbsp milk
  • salt and pepper
  • 15g of butter
  • 175g of drained sweetcorn
  • toast

Then, simply beat your eggs in a bowl with milk, salt and pepper. Melt the butter in a pan and make scrambled eggs in your usual way. Just before the eggs are ready, stir in drained sweetcorn and cook until hot. Pile on toast and serve at once.

Despite this cursed illustration haunting my nightmares, I still love you Mary.

Share Button